

Coffee cupping explained: Master the art of tasting at home
TL;DR:
- Coffee cupping is a standardized method that isolates coffee’s natural flavours, allowing accurate evaluation and comparison.
- Practicing at home enhances sensory skills, helps identify subtle notes, and builds a reliable coffee profile library.
Most coffee drinkers assume they’re tasting everything in their cup. They’re not. The subtle citrus brightness of an Ethiopian single origin, the cocoa depth of a Brazilian blend, the clean finish that separates a well-roasted bean from a mediocre one — these details stay hidden unless you approach tasting with a structured method. Coffee cupping is that method. It’s a standardised protocol used by roasters, buyers, and quality specialists worldwide to evaluate coffee accurately, and inconsistencies in variables like grind size, water temperature, and steep time affect reliability of what you actually detect. The good news: you can do it at home.
Table of Contents
- What is coffee cupping and why does it matter?
- Setting up a consistent cupping session at home
- How to taste: A beginner’s guide to evaluating coffee
- Avoiding common mistakes and achieving consistency
- The home barista’s advantage: Balancing science and exploration
- Ready to try? Upgrade your beans and tools
- Frequently asked questions
Key Takeaways
| Point | Details |
|---|---|
| Cupping reveals flavour | Coffee cupping helps you discover subtle notes that everyday brewing masks. |
| Consistency is crucial | Standardising grind, water temperature, and steep time is key for accurate tasting results. |
| Anyone can cup coffee | With simple tools and standard methods, you can enjoy cupping at home. |
| Cleanliness avoids errors | Keeping equipment scrupulously clean ensures you taste the coffee, not residue. |
| Experiment and enjoy | Balancing scientific rigour with curiosity makes home cupping rewarding and fun. |
What is coffee cupping and why does it matter?
Coffee cupping is a structured tasting protocol designed to evaluate coffee flavour in a controlled, repeatable way. It removes the variables introduced by different brewing methods, isolating the coffee itself as the subject of evaluation. Cupping allows systematic comparison of coffee samples using standardised methods to assess flavour, making it the gold standard in the specialty coffee industry.
The practice has roots in professional coffee trading. Green coffee buyers, importers, and roasters have used cupping for well over a century to assess quality before purchase and to profile batches after roasting. Today, the Specialty Coffee Association (SCA) maintains a formal cupping protocol used across the globe, but the core principle has always been simple: taste coffee the same way every time so that differences between samples are meaningful.
“Cupping strips away the noise of different brewing variables so you can hear what the coffee is actually saying.”
For home baristas, cupping offers something that everyday brewing doesn’t. When you make a French press or pull an espresso, you’re tasting the combination of coffee and method. Understanding brewing methods and extraction is useful, but cupping goes further. It isolates the raw characteristics of the bean: its natural sweetness, its acidity, its coffee body and flavour, and its finish.
Key benefits of cupping at home:
- Identify flavour notes you’d otherwise miss in everyday brewing
- Compare multiple coffees side by side with confidence
- Learn to distinguish quality characteristics from defects
- Build a personal reference library of coffee profiles
- Improve your brewing decisions based on what you actually taste
The difference between cupping and ordinary tasting isn’t just technique. It’s intent. Cupping is deliberate, focused, and repeatable. That’s what makes it powerful.
Setting up a consistent cupping session at home
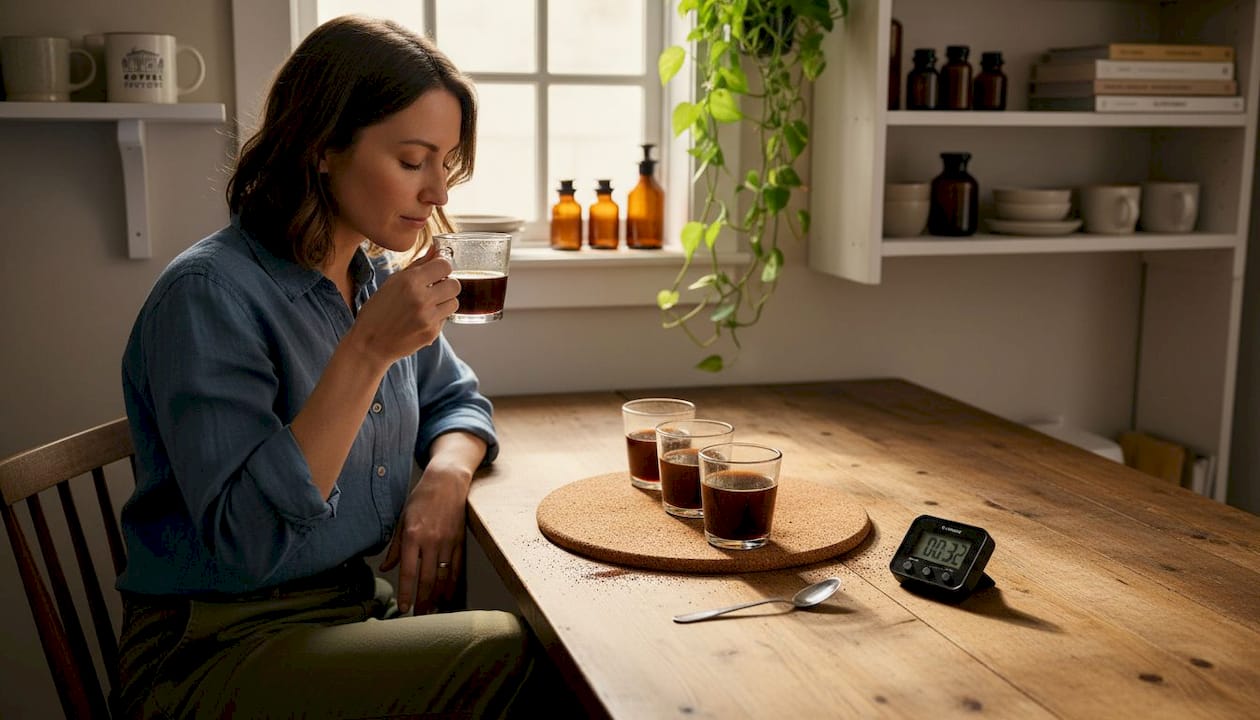
Preparation is where most home cuppers go wrong. Inconsistencies in grind size, water temperature, steep time, and cleanliness can distort flavour comparisons, making it impossible to know whether differences come from the coffee or your setup. Getting this right from the start is essential.
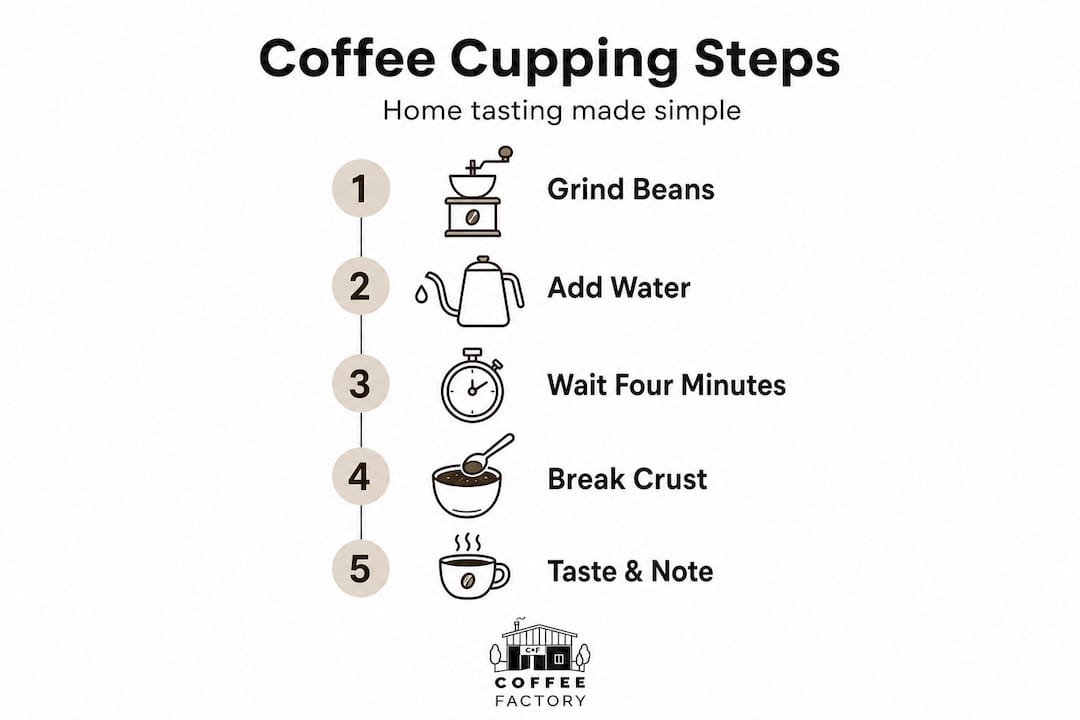
Here’s a step-by-step guide to setting up your first session:
- Choose your coffees. Select two to four coffees to compare. Single origins work well for learning. Aim for variety: different origins or roast levels.
- Grind fresh, grind consistently. Use a consistent medium-coarse grind for all samples. Weigh each portion. The standard ratio is 8.25g of coffee per 150ml of water.
- Prepare your cups. Use identical cups or bowls for each sample. Ceramic is preferred. Check cleanliness and setup before you begin.
- Smell the dry grounds. Before adding water, take time to note the dry aroma of each sample. Write down your observations.
- Add water at the correct temperature. Pour water just off the boil (around 93°C to 96°C) over each cup simultaneously, saturating all the grounds.
- Wait four minutes. Do not stir. Allow the crust to form on the surface.
- Break the crust. Use a cupping spoon to gently push through the crust on each cup and bring it to your nose. This is one of the most aromatic moments in the entire session.
- Skim the grounds. Remove the floating grounds and foam from each cup before tasting.
- Taste as the coffee cools. Start tasting when the coffee reaches around 70°C, then again at 55°C and 45°C. Flavours evolve significantly as temperature drops.
- Record everything. Use a simple scoring sheet or notebook. Notes made in the moment are far more useful than memory.
| Variable | Ideal range | Notes |
|---|---|---|
| Grind size | Medium-coarse | Consistent across all samples |
| Coffee dose | 8.25g per 150ml | Use a digital scale |
| Water temperature | 93°C to 96°C | Just off the boil |
| Steep time | 4 minutes | No stirring until crust break |
| Cup size | 150ml to 200ml | Identical for all samples |
Refer to home brewing basics for guidance on water quality and grind settings. Also worth noting: freshness matters enormously. Allow newly roasted beans to degas after roasting for at least 24 to 48 hours before cupping.
Pro Tip: Use filtered water rather than tap water. Chlorine and mineral imbalances in tap water can suppress delicate flavour notes and skew your results across samples.
How to taste: A beginner’s guide to evaluating coffee
Tasting during a cupping session is different from sipping your morning brew. A standardised taste protocol helps reveal differences in coffee that everyday brewing may mask. The goal is to evaluate specific attributes in a deliberate sequence.
Start with aroma. Assess the dry grounds, the wet aroma immediately after adding water, and the aroma released when breaking the crust. Each stage reveals different volatile compounds. You might notice florals, citrus, nuts, or earthy tones depending on the origin and roast level.
Then move to taste. Slurp the coffee from the spoon — this sounds inelegant, but it’s intentional. Slurping sprays the coffee across your entire palate, including the back of your tongue where bitterness registers and the sides where acidity is most detectable. Evaluate the following:
- Acidity: Brightness and liveliness. High acidity feels crisp; low acidity feels flat. Ethiopian coffees often show pronounced citric acidity.
- Sweetness: Natural sugar compounds in the bean. A well-processed coffee will feel balanced and rounded rather than sharp or harsh.
- Body: The weight and texture of the coffee in your mouth. Fuller body feels heavier, like whole milk. Light body is thinner, more tea-like.
- Flavour: The complete taste impression. Stone fruit, chocolate, floral, nutty, earthy — these are all legitimate descriptors.
- Aftertaste: What lingers after you swallow. A clean, extended finish is a positive indicator of quality.
| Cupping term | What you experience |
|---|---|
| Acidity | Brightness or tartness on the sides of the tongue |
| Body | Texture or weight of the liquid in the mouth |
| Sweetness | A rounded, balanced sensation without harshness |
| Aftertaste | The flavour that remains after swallowing |
| Aroma | Fragrance from dry grounds, wet crust, and the open cup |
| Defect | Off-flavours: mustiness, sourness, harsh bitterness |
Don’t worry if your vocabulary for flavours is limited at first. That’s entirely normal. The important thing is to note something — anything — that you detect. Over time, your descriptive ability grows.
Pro Tip: Taste with at least one other person and compare notes before discussing them. You’ll often find that two people pick up different things in the same cup, which broadens what you both notice in future sessions.
Avoiding common mistakes and achieving consistency
Even experienced home cuppers encounter recurring issues. Knowing what typically goes wrong makes it much easier to correct.
“Inconsistent preparation is the single biggest obstacle to meaningful comparison. Two cups prepared differently will never give you useful data, no matter how well-trained your palate is.”
Common pitfalls in home cupping:
- Inconsistent grind sizes across samples. Even a small variation alters extraction and changes flavour perception significantly.
- Ignoring water quality. Hard or chlorinated water introduces unwanted flavours that overlay what the coffee is actually offering.
- Skipping the wait. Rushing past the four-minute steep or breaking the crust too early affects extraction and the aromatic release.
- Unclean equipment. Residual oils or grounds from previous sessions contaminate the next. Inconsistent preparation variables lead to misleading comparisons, and cleanliness is a critical part of standardisation.
- Too many samples at once. Starting with more than three or four coffees can overwhelm your palate. Palate fatigue sets in faster than most people expect.
- No written records. Memory fades quickly. Without notes, you can’t track your progress or build reliable references.
Keeping a cupping journal is one of the simplest, most effective habits you can develop. Record the coffee name, origin, roast date, and your sensory observations for each session. Over time, patterns emerge. You’ll start to notice how barista skills for accuracy apply directly to your cupping consistency as well.
For quick reference between sessions, a quick brew guide can help reinforce the habits that keep your setup reliable.
Consistency doesn’t require laboratory precision. It requires enough discipline to follow the same steps every time and the habit of writing things down.
The home barista’s advantage: Balancing science and exploration
Here’s something worth saying plainly: not every cupping session needs to be a formal exercise. The professional world of coffee cupping involves scoring sheets, calibrated tasters, and strict protocols designed to remove subjectivity entirely. That’s the right approach when you’re buying tonnes of green coffee or quality-controlling a roastery output.
At home, you have something professionals don’t: the freedom to experiment without consequence. You can cup coffees you enjoy, in a comfortable setting, with friends who may know nothing about specialty coffee. That informality is not a weakness. It’s an advantage.
What matters at home is retaining the core discipline: same dose, same grind, same water, same timing. That baseline consistency is what allows your sensory notes to mean something. Once that’s in place, everything else can be flexible. Taste a coffee you’d never normally buy. Cup a supermarket bean next to a specialty roast. Note what’s different and why.
Understanding what a roastery offers for home coffee also helps. Freshness and sourcing directly affect what you’ll detect in a cupping session. A coffee roasted within the last two weeks will show dramatically more complexity than one that’s been sitting on a shelf for months.
The honest truth about home cupping is this: most people worry too much about doing it perfectly, and that worry stops them from doing it at all. Start simple. Cup two coffees. Write five words per cup. That’s enough to begin building genuine tasting skill.
Ready to try? Upgrade your beans and tools
Getting started with cupping is straightforward when you have the right coffees to work with. Freshly roasted beans with clear origin information give you the most to explore during a tasting session.

The Coffee Factory offers a range of unique coffee varieties roasted at their Devon roastery and shipped fresh to your door, including single-origin options ideal for side-by-side cupping comparisons. For those ready to invest in the process, a selection of quality brewing equipment is available to support accurate, repeatable sessions at home. Coffee orders over 1kg qualify for free shipping, and subscription options mean you’ll always have fresh beans ready for your next cupping session. A Taster Box makes a practical starting point for exploring multiple coffees without committing to full bags.
Frequently asked questions
Is coffee cupping only for professionals?
No — anyone can cup coffee at home with clear benefits, as long as standard preparation is followed consistently. The skills develop quickly with regular practice.
What equipment do I need for coffee cupping?
You need fresh coffee, hot water, a digital scale, identical cups or bowls, a cupping spoon, and a timer. Proper tools like a scale and clean cups are what enable reliable flavour comparison between samples.
How do I avoid bitterness in cupping results?
Use the correct grind size, water temperature between 93°C and 96°C, and adhere strictly to the four-minute steep time. Variables like water temperature and grind consistency must be controlled to avoid introducing bitterness that isn’t actually in the coffee.
Can coffee cupping help me choose better coffee beans?
Yes. Cupping allows more informed choice by comparing the qualities of different coffees directly, making differences in origin, processing, and roast level far more apparent than everyday brewing allows.
How often should I clean my equipment during cupping?
Clean between every sample and after each complete session. A clean setup and equipment are essential for ensuring that what you’re tasting comes from the coffee itself, not residual oils or contamination from previous samples.