
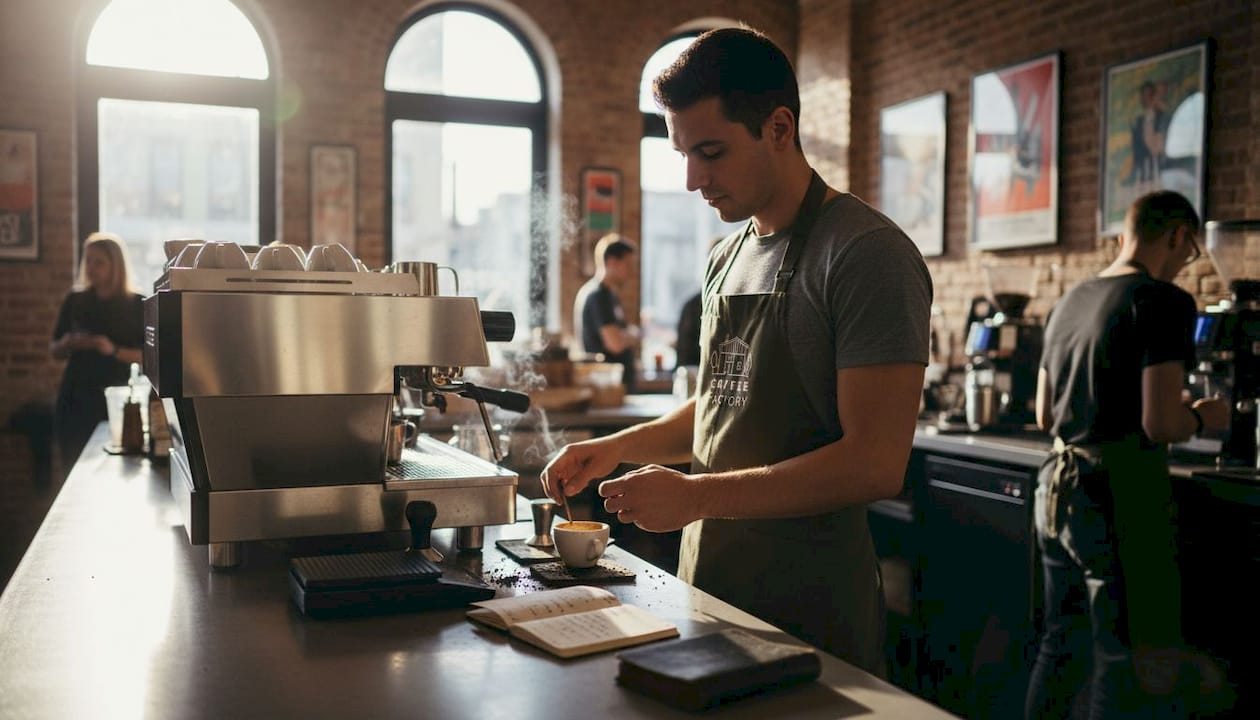
Essential barista training tips to elevate your coffee skills
TL;DR:
- Systematic dial-in of variables is more effective than equipment upgrades for improving home espresso.
- Recording parameters and focusing on technique, like grind and tamping, ensures consistent, quality shots.
- Adapting brewing techniques for roast level and practicing regularly develop skill and confidence.
Brewing café-quality espresso at home is less about owning a £2,000 machine and more about understanding what is actually happening in your cup. Most home baristas plateau early because they change equipment rather than refine technique. Systematic dial-in over upgrades is the approach professionals rely on, and it works just as well at home. This guide covers the core skills, parameters, and practice routines that genuinely move the needle, from getting your recipe right and reading your grind, to adapting for roast level and building lasting consistency.
Table of Contents
- Mastering espresso basics: Parameters and recipes
- Dialling in your grind: The key to extraction control
- Roast level matters: Adapting your technique for light and dark coffees
- Tamping and puck prep: Debunking myths and finding what works
- Smart practice routines: Building confidence and consistency
- Why skill-building beats endless equipment upgrades
- Level up your barista journey with Coffee Factory
- Frequently asked questions
Key Takeaways
| Point | Details |
|---|---|
| Track key espresso variables | Consistently measure dose, yield, time, and temperature to improve shot quality. |
| Dial in grind size first | Small changes in grind can solve sour or bitter tastes before changing recipes or gear. |
| Adapt for roast level | Light or dark roasts need different temperatures and brew ratios for best flavour. |
| Focus on technique, not force | A level, even tamp is more important than pressure when puck prepping. |
| Practise and record | Structured, regular practice leads to noticeable improvements in barista skills. |
Mastering espresso basics: Parameters and recipes
Every professional barista works from a recipe. Not a rough idea or a gut feeling, but a set of specific numbers recorded and repeated until the result is predictable. For home brewing, adopting this mindset is the single biggest shift you can make.
The core espresso recipe has five variables: dose (how much ground coffee goes in), yield (how much liquid comes out), ratio (the relationship between the two), brew time (how long extraction takes), and brew temperature (the water temperature in degrees Celsius). Understanding flavour and extraction explained helps you see exactly how each variable pushes taste in a particular direction.
A reliable starting point for medium roast espresso is an 18g dose, 36g yield at a 1:2 ratio, extracting in 25 to 30 seconds at 91 to 93°C. This is the benchmark most baristas return to when something goes wrong. It is not a rule, but it is an anchor.
Key parameters to record for every shot:
- Dose (grams in)
- Yield (grams out)
- Brew ratio (dose to yield)
- Extraction time (seconds)
- Water temperature (°C)
- Roast level of the coffee used
“A recipe without records is just guessing. Logging every shot, even a bad one, turns random attempts into a training system.”
Tracking shots matters because taste memory alone is unreliable. If you pulled a great shot yesterday but changed nothing consciously, you cannot repeat it without data. Exploring single origin espresso flavour also demonstrates how dramatically the same recipe can perform differently across bean origins, which reinforces why written records matter.
Espresso parameter reference table:
| Variable | Light roast | Medium roast | Dark roast |
|---|---|---|---|
| Dose | 17 to 19g | 17 to 19g | 16 to 18g |
| Yield | 38 to 44g | 34 to 38g | 28 to 34g |
| Ratio | 1:2.2+ | 1:2 | 1:1.8 |
| Time | 28 to 35s | 25 to 30s | 22 to 27s |
| Temperature | 93 to 96°C | 91 to 93°C | 88 to 92°C |
Pro Tip: Keep a simple note on your phone with four fields: dose, yield, time, and a one-word taste note (sharp, flat, balanced, bitter). Even 30 seconds of logging per shot produces valuable patterns within a week.
Dialling in your grind: The key to extraction control
Grind size is the most powerful and most frequently overlooked variable in home espresso. It controls how quickly water passes through the coffee bed, which directly determines how much flavour is extracted and what character that flavour has.
The relationship is straightforward. A finer grind slows water flow and increases extraction. Too fine and the shot runs slow, tastes sour or sharp, and feels thin. A coarser grind speeds flow and reduces extraction. Too coarse and the shot runs fast, tastes hollow or bitter, and lacks body. Adjusting grind for extraction is always the first correction to make before touching any other variable.
Follow a stepwise grind dial-in method for the most efficient results:
- Pull a shot using your current grind setting and note the yield and time.
- Taste the shot and identify the dominant off-note: sour or sharp suggests under-extraction; flat or bitter suggests over-extraction.
- Make one small grind adjustment, finer if sour, coarser if bitter, no more than one click or step at a time.
- Pull the next shot at the same dose and target yield.
- Taste again and record both the adjustment and the result.
- Repeat until the shot falls within your target time and tastes balanced.
The quick brew adjustments guide provides a practical reference for this process across different brew methods, not just espresso.
Grind issue comparison table:
| Issue | Taste outcome | Recommended action |
|---|---|---|
| Too fine | Sour, sharp, thin | Coarsen grind by one step |
| Too coarse | Bitter, hollow, flat | Refine grind by one step |
| Inconsistent particle size | Uneven, muddy | Check grinder burrs for wear |
| Correct grind | Balanced, sweet, full | Record setting and hold |
One critical error many home baristas make is adjusting two variables at once. If you change grind size and dose simultaneously and the shot improves, you cannot identify which change caused the improvement. You lose the ability to diagnose and repeat.
Pro Tip: Only ever change one variable at a time. Write down every adjustment. This turns a frustrating morning into a productive training session.
Roast level matters: Adapting your technique for light and dark coffees
Roast level is not just a flavour preference. It changes the physical structure of the coffee bean, which means it directly affects how water interacts with the grind during extraction. A technique that produces a perfect shot with a medium roast will almost certainly produce a poor result with a light or dark roast if kept unchanged.
Light roasts require higher temperatures, specifically 93 to 96°C, longer extraction ratios of 1:2.2 or more, and extended brew times in the range of 28 to 35 seconds. Light roast beans are denser and less soluble. They need more energy from hot water and more contact time to release their full flavour profile. Rushing a light roast produces a flat, sour, or grassy cup that never reflects what the coffee can genuinely offer.
Dark roasts behave in the opposite direction. They are more porous, more soluble, and extract faster. Targeting 88 to 92°C, a shorter ratio of around 1:1.8, and a brew time of 22 to 27 seconds prevents over-extraction, which in dark roasts produces harsh, ashy, or aggressively bitter results. Browsing light roast coffee options and dark roast options side by side is a practical way to understand how different the two categories actually feel and taste.
Do’s and don’ts by roast type:
Light roast:
- Do increase water temperature to 93 to 96°C
- Do extend your ratio beyond 1:2
- Do allow 28 to 35 seconds extraction time
- Do not use dark roast temperature settings
- Do not cut extraction short expecting a sweeter result
Dark roast:
- Do reduce water temperature to 88 to 92°C
- Do shorten your ratio to around 1:1.8
- Do target 22 to 27 seconds extraction time
- Do not apply light roast temperatures
- Do not extend brew time expecting more complexity
When you change only the roast level while holding all other variables fixed, the difference in the cup is dramatic. This is one of the most instructive experiments any home barista can run.
Tamping and puck prep: Debunking myths and finding what works
Tamping sits at the centre of a long-running debate in home espresso circles. For years, the standard instruction was to tamp with around 30 pounds of force, finish with a polishing twist, and press firmly enough to feel resistance. Many home baristas still follow this guidance without questioning it.
Current thinking is more nuanced. Modern tamping research shows that the exact tamping pressure between 30 and 50 pounds is largely irrelevant once a machine’s pump is generating 9 bars of pressure during extraction. At that level, any reasonably firm tamp will compress the puck adequately. What matters far more is that the tamp is level, because an uneven puck creates channelling, where water forces its way through the path of least resistance rather than extracting evenly across the whole bed.
“An even tamp at moderate pressure outperforms a forceful tamp at the wrong angle every single time. Channelling from an uneven puck is the most common cause of inconsistent espresso at home.”
Follow these puck prep steps for reliable results:
- Dose the correct amount of ground coffee into a dry, clean portafilter basket.
- Distribute the grounds evenly using a finger sweep or distribution tool, working around the basket to level the surface.
- Place the tamper flat and square on the coffee bed, using your elbow and wrist in line to maintain a level position.
- Apply firm, downward pressure, around 15 to 20 kilograms of force, without twisting or rocking.
- Check the tamped surface is visually level before locking into the group head.
Setting up a home coffee bar with a dedicated preparation space makes consistent puck prep much easier to maintain, and the home barista essentials checklist is useful for identifying what tools actually support better prep. Prioritising grind and puck prep before chasing new equipment upgrades is the practical approach that produces the fastest real-world improvements.
Pro Tip: Focus on a level tamp every single time rather than on force. An uneven puck creates more extraction problems than tamping lightly ever will.
Smart practice routines: Building confidence and consistency
Consistent practice is what separates a home barista who occasionally pulls a great shot from one who pulls a great shot reliably. Random experimentation produces random results. Structured routines produce repeatable outcomes and genuine learning.
Systematic dial-in and consistent routines are what professionals use to maintain quality across hundreds of shots per day. Applying the same discipline at home, even for one or two shots a day, compounds rapidly into meaningful skill.
Simple home practice routines to build into your week:
- Shot journalling: Record dose, yield, time, and a brief taste note for every shot. Review weekly to spot patterns and repeat successes.
- Side-by-side tastings: Pull two shots back to back using slightly different grind settings and taste them together. The contrast makes differences far easier to identify than tasting in isolation.
- Blind tests: Ask someone in your household to prepare two shots using different variables while you taste without knowing which is which. This removes bias and sharpens palate accuracy.
- Recipe hold days: Pick one day per week to hold all variables fixed and focus purely on consistency of process, distribution, tamp, and timing.
- Roast comparison sessions: Brew the same recipe with two different roast levels on the same day to understand how roast affects extraction in real time.
Identifying improvement through taste, rather than purely through numbers, is a skill that develops with repetition. Numbers tell you what happened. Taste tells you whether it matters. The two together are far more powerful than either alone.
Visit better flavour brewing tips and the detailed coffee brewing guide for structured frameworks you can apply directly to your home routine.
Pro Tip: Brew and taste alongside a friend or partner at least once a week. Honest, immediate feedback from another palate accelerates learning faster than tasting alone and makes the process noticeably more enjoyable.
Why skill-building beats endless equipment upgrades
There is a persistent belief in home coffee circles that the next grinder or the next machine will fix everything. It rarely does. The uncomfortable reality is that most inconsistency in home espresso comes from a lack of process discipline, not from equipment limitations.
Prioritising systematic dial-in over equipment upgrades is the professional mindset. Baristas in top specialty cafés work with equipment far simpler than what many home enthusiasts own, yet they produce more consistent results because they understand their variables and practise intentionally.
The obsession with upgrades also creates a specific problem: it moves attention outward, toward products, rather than inward, toward technique. Better distribution, tighter dose control, and consistent puck prep are all free improvements. They require nothing more than attention and repetition.
Developing honest awareness of your own palate is arguably the most valuable skill of all. You need to be able to taste what is wrong before you can fix it. No machine provides that. It comes only from practice and deliberate feedback.
Exploring accessories for better home brews is useful once core technique is solid, but the accessories support good technique rather than replace it. Build the skill first. The results follow.
Level up your barista journey with Coffee Factory
The skills covered in this article are built on one practical foundation: starting with quality, fresh coffee that behaves predictably. Stale or inconsistently roasted beans make dialling in far harder because the coffee itself is a moving variable.

Coffee Factory roasts fresh at their Devon roastery and ships directly to your door, giving you a consistent, reliable base to practise with. Explore the range of fresh ground coffee to find options suited to your machine and roast preference. For step-by-step recipes across multiple brew methods, the Coffee Factory brewing guide provides clear, structured guidance to complement everything covered here. Free shipping is available on orders over £20 across the UK.
Frequently asked questions
What is the ideal espresso recipe for home baristas?
A classic starting point is 18g in, 36g out, brewed for 25 to 30 seconds at 91 to 93°C with medium roast coffee. Adjust from this anchor based on taste.
How do I fix sour or bitter espresso shots?
For a sour taste, use a finer grind to increase extraction; for bitterness, go coarser to reduce it. Change one variable at a time so you can identify what actually made the difference.
Should tamping force really be 30 pounds or more?
No. Modern tamping guidance shows that exact force between 30 and 50 pounds is largely irrelevant at 9-bar pump pressure. An even, level tamp is what prevents channelling and inconsistency.
How should I adapt for very light or dark roasts?
Use higher temperature and longer extraction for light roasts, and lower temperature, shorter ratio for dark roasts. Holding all other variables fixed when you switch roast levels makes the difference immediately clear.
How can I measure my progress as a home barista?
Keep a shot log, taste regularly alongside others, and focus on repeatable, systematic routines. Progress shows up in consistency first, then in the ability to diagnose and correct problems quickly.